1 Under the galley sink is a convenient place for a waste basket, but on First Edition, there's all sorts of plumbing in the way, making a basket hard to use. So I installed a sliding basket. |
 2 Fits nicely. A bit more routing of other plumbing and it's good to go! |
 3 My old masthead anchor light used an incandescent bulb and was heavily fogged from 25 years of UV. That meant it used a LOT of power and still delivered almost no light. It used so much power that it would flatten the house battery in about 4 or 5 nights. So I bought a newer one, and modified it. The top of the mast angles forward 15 degrees, so I had to machinethe white delrin to have the light sit flat. The aluminum base is designed to bolt to existing holes in the masthead. Inside though, is the magic. |
 4 Rather than incandescents, I wanted LEDs, and I wanted it BRIGHT. The top row of white LEDs are so bright the light can be easily seen in full sunlight. I suspect people ashore can read by it, yet it draws 1/20th the power of the old light, about a tenth of an amp. Each of white LEDs is good for 120 degrees, so only 3 are actually required. By using 6, I cover myself in the event of failure. I also wanted nav lights up top (a belt and suspenders kinda guy), so below the 360 degree whites are a 112.5 degree red and green, and a 135 degree white. The aluminum discs are actually lenses, if you will. I turned them to just the right angles, and get a decently crisp delineation between the colours, well within Coast Guard spec. Without them, there'd be a huge smear. For reliability, everything is covered in epoxy; no corrosion, no vibrating apart. |
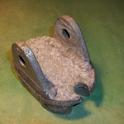
 5 A friend bought an old boat, a wonderful boat in most every respect except that nearly every sheave was cracked and broken. Sadly, the manufacturer was long gone. And while this block is removeable and could be replaced with something else, a least a dozen others were fixed, through bolted through the cabin or deck. Simply replacing these was going to be horrible. |
 6 Repairs are possible though, and again the lathe comes to the rescue. I made a custom tool to cut a radius, chucked up some delrin and Bob's your uncle; a new sheave. |
 7 Here's another example, with a smaller sheave. |
 8 The difficult bit is replacing the pop rivet that the sheave turns on. While they can be drilled out in situ, installing a new op rivet is almost impossible. However, the local stainless fastener supplier makes some very cool "nuts". Add a short bit of threaded rod and some permanent locktite and you have wonderful replacement, easily as strong as the original. |